
Are you tired of constantly checking your roof for leaks? Do you cringe every time it rains because the fear of a leak is always on your mind? If so, then this blog post will be just what you need. Here are 20 easy steps to make sure that never have a roofing leak again!
Yes, that’s right. There are 20 easy steps to help you properly maintain your roof, so you never have to worry about leaks again!
Step 1: Make Sure You Get Quality Roofing Materials
If there is one thing that we all know, it’s that shoddy roofing materials will not hold up well over time. When replacing any of the following, make sure to get quality products:
Does this mean you can’t use a cheaper alternative? No. However, consider the quality of the product as compared to its price. In other words, if you’re getting a cheap roof for $10/square and a high-quality roof for $20/square, you may as well get a better-quality roof.
Step 2: Learn How to Find a Roof Leak and What Caused Them
Sometimes people have a roofing leak, but they never even know it. They’re just drips that fall into a sink or something and then eventually make their way back out again. (This is easy to do in showers, baths, and sinks).
The first thing you’ll want to do if you suspect a leaking roof is to check things like your ceiling regularly for any signs of dampness. If you don’t find anything, do this: cut open some places around your house with scissors. Then, seal them back up. This allows water inside the house so that it will drip in easily detectable areas instead of having to deal with the difficulty of checking random spots.
Step 3: Fix What You Find
When you find a leak, go ahead and do a roof leak repair right away. Don’t wait until later in the day or tomorrow. If you don’t promptly address leaks, they will get worse over time and may even cause rot to your home.
Otherwise, the leak will grow big, cause more damage, and become more expensive to repair. At this stage, no DIY solution will likely work. It may only make the problem way worse. You now need a professional roofer.
Step 4: Do Your Research Before Hiring Anyone for Work
Before calling someone for work (like roofing), make sure to do your homework before deciding on a particular company or contractor. This step is especially important because we all know that “a poor job will lead to more damage.” Meanwhile, a quality job will help prevent leaks (or at least allow for easier detection). Do NOT go with the first guy who calls you!
Step 5: Check Warranty Info on Materials You Buy
Always check information and warranties before buying new materials to fix a roof leak. Most of the time, these are pretty clear, but it doesn’t hurt to be sure.
What do you usually find in the warranty document? It basically says that if a leak is caused by defective material from the roofing manufacturer or provider, they’ll fix or replace them free of charge.
But if you just need your gutters fixed, all I can say is good luck. You’re probably not going to get warranty coverage here since most gutters are subject to wear and tear.
Step 6: Make Sure Gutters Are Clean BEFORE It Rains
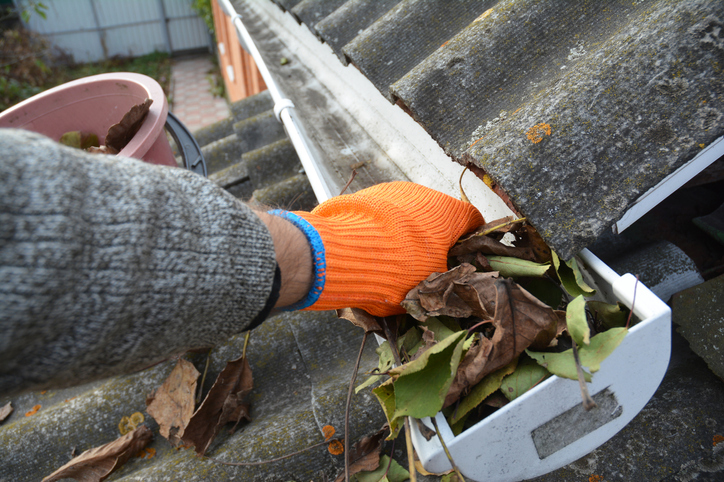
Unlike roofing, gutters usually don’t get a lot of love. However, taking care of it will also help take care of the roof and avoid a pesky roofing leak.
Why do you need to clean the gutter? Cleaning ensures they can properly absorb water into them when it rains.
If there are leaves, debris, spider webs/cobwebs, or even live and dead animals in there, then the rain will just run off them and cause leaks elsewhere (or at least make things worse).
Step 7: Get Rid of Water Heater Tank Flashing
Flashing is a layer of material used to waterproof the joint between two dissimilar materials. In plumbing, flashing is used to seal and protect the joints where pipes or fittings join together, or where they exit a structure.
The main purpose of flashing, in this case, is to stop water from running farther up into your home after it enters through the pipe or fitting. The most common cause of leaks from pipes and fittings are cracks that form at these joints.
To protect against cracks forming, flashing must be installed to cover all surfaces that contact each other and any gaps between them. Flashing should also be cut back (have an overhang) so that it doesn’t trap moisture under it and promote further corrosion (rusting).
If you do not know how to do this safely, hire a professional. This is something that cannot be done correctly by anyone who hasn’t taken classes in electricity, plumbing, gas lines, and so on. And even then, it’s still very dangerous.
Step 8: Make Sure Your Attic Insulation Is Properly Installed
To keep a house cool, it is important to insulate your attic well. You can do this yourself. All you need to get started are some basic tools and materials. In fact, the hardest part will be pulling up the tarp that covers your attic’s access hole!
Be sure the room below your attic is also airtight and insulated by installing wall insulation or re-insulating an existing wall that may be less than effective. Make sure that any holes around pipes, wiring, and other penetrations through ceilings from the floor above are sealed for maximum energy savings.
There are several types of insulation available for attics including fiberglass batts, mineral wool rolls, recycled paper rolls, woven glass fabric blankets, and rigid foam boards.
Step 9: Fix a Leaking Roof Caused by Another Company
If you find leaks after they’ve been fixed (or before that, for that matter), go ahead and contact a roofing company or other professionals so that they can fix it again. Many contracting companies will not charge you again if there was an error on their part, especially if you’re nice to them and don’t have any attitude problems. Worst-case scenario, at least your leak will be fixed!
Step 10: Trim Trees/Branches Away from Your Roof
If branches or leaves fall down into your gutters while it’s raining, then those items will flow through the pipes until they make it back outside (usually right near your roof).
Even worse are things that live in trees like squirrels. They will chew on the shingles so that they can get on top of the roof and then use them as leverage when jumping to another branch/tree.
This causes small holes in the shingles, which usually get progressively bigger over time due to more chewing and also from corrosion effects caused by acid rain. Before you know it, you have a roofing leak to deal with.
Step 11: Fix Damage Caused by Ice Thawing
What is an ice dam? It is the accumulation of snow on a roof that has frozen and become an impassable barrier. Ice dams often lead to icicles, which can be extremely dangerous for children playing near them.
Although it is tempting to remove icicles right away, it is important to remember that they are actually a safety device. By forming on the edge of your roof, they prevent water from traveling down sloped roofs and causing damage to your home below. It is best to wait until they have melted or fallen off naturally before taking any action.
If you live anywhere where snow is a big part of winter weather, there really isn’t much you can do about this.
The problem is, when a lot of ice dams accumulate, they increase the level of moisture on the roof. Over time, this can lead to corrosion, holes, and then leaks. If you can keep snow from accumulating on your roof in the first place, that will help a great deal.
If you have been living with roof leaks for years and don’t know what else to do about them, try going up there and removing the ice dam yourself. You’ll save money plus get some exercise at the same time!
Step 12: Rake Leaves Away from Your Home
Again, make sure you use an extension ladder or scaffolding if necessary. NEVER EVER attempt to do this without one. The reason is simple. It’s all too easy for someone to accidentally fall off something that is only 12 feet high. If your roof’s 18 feet tall (which it should be), the ground beneath you can be a looooong way away.
If you don’t know how to use an extension ladder or scaffold, then learn. Doing so might save your life one day!
Step 13: Get the Chimney Professionally Inspected and Cleaned Annually
Chimney cleaning is relatively inexpensive (usually around $100-150) and will prevent most chimney fires if done properly. Sadly, in many cases, the homeowner did not believe their fireplace had any problems until their house burned down from a fire starting in their living room.
Do not take a chance with your own life! If you do not have a fireplace, or the one in your home doesn’t qualify as being able to burn things like wood (as opposed to natural gas), then skip this step.
Step 14: Replace Any Loose Shingles
Loose and missing shingles are some of the most common reasons for a roofing leak. If they’re ignored long enough, they will eventually lead to even more severe problems like leaking chimneys and gables.
Tightening them is usually all that’s needed, although some cases may require new ones. Make sure you use real asphalt shingles and not the cheaper ones that are made from other materials.
Step 15: Clean Out the Gutters and Downspouts Annually
Yes, it’s a lot of work, and you can’t really get around it if you want your roof to last. However, if you don’t clean them annually, not only is there a chance of water getting through where it shouldn’t be, but all kinds of things will start living in them. They could eventually make their way into your roof via holes formed by corrosion, and now you have to know how to fix a leaking roof. It’s usually easier to just buy someone else’s dinner for doing it every year!
Step 16: Check Your Exterior Walls for Condensation
Possible water damage around windows is one of those things that most people don’t consider until it happens. But the fact remains that unless you live in an older home, there should never be puddles on your basement floor after a rainstorm.
If there are, then you need to check where they’re coming from, such as a roofing leak. The best way is usually to simply see if you can trace them back to something like a window).
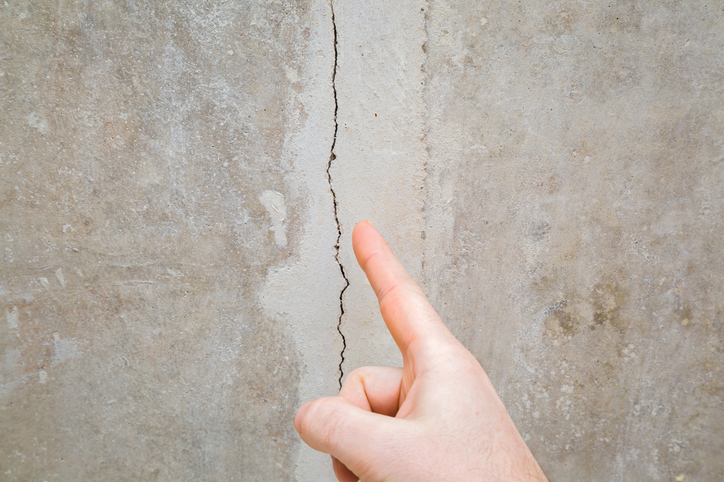
Moisture inside walls is no laughing matter. If it gets bad enough and doesn’t get dried out quickly, even the strongest foundations will crack!
Step 17: Check for Signs of Molds
Molds on roofs are signs of poor roofing management. The mold can indicate problems that have been ignored for a long time, especially if there is also a roofing leak problem.
In addition to bringing about considerable damage to the roof itself, any possible leakages caused by the mold help make homes susceptible to other types of hazards such as wood rot and structural collapse.
If you want to avoid this kind of problem, it’s always better and more prudent to regularly check your roofs – at least twice a year – when they’re clean and dry, so as not to miss out on any sign of mold lurking around.
Actually checking for molds can be done in two ways: visually inspecting all over the surface and also touching them with fingers.
Step 18: Fix a Roof Leak by Replacing It When Necessary
Replacing a roof is not an easy decision. In some cases, the roof is perfectly fine but the shingles have reached their useful life or you just want something new.
On the other hand, your roof may be failing and need a replacement immediately. Either way, there are some key factors you should consider before deciding when to replace your roof.
Usually, roofs last twice as long as the warranties for asphalt shingles and 20 years longer on metal roofs than foam-cored roofs (25 and 35 years). You can determine whether it’s time to replace a roof by checking its structural integrity.
You can do this by pounding on the roof with a hammer. If you hear lots of hollow “bonging” sounds, there are likely problems in those areas that will only get worse over time.
The same thing goes if you can see tiny cracks forming on any shingles—even if they aren’t close to falling off yet. Asphalt shingles have an expected lifespan range between 20 to 40 years, depending on the manufacturer and your geographic location.
Step 19: Clean Out Your Gutters Annually
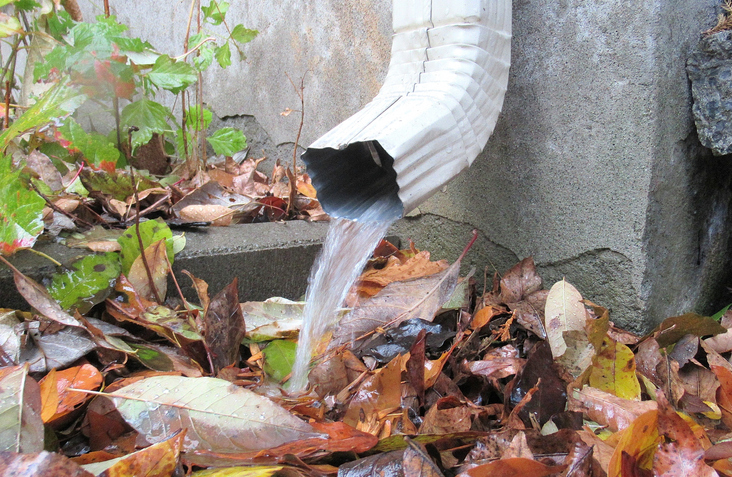
If you want your roof to last, you need to clean out your gutters every year. The fact that many people don’t do so means that more maintenance will have to be done later on down the road. It will not only cost you money at first but also make it more likely for leaks to develop since parts of the gutter will be weaker than they should be from disuse.
Step 20: Check Underneath a Roofing Leak
If you are going to check any leaks, make sure that you do it in the evening when no sunlight is present. This will allow you to see clearly what’s going on.
If there is a leak after dark, then what you’re seeing is more than likely running water (and not condensation) because light won’t reflect off water as much as it would off shiny surfaces like metal/wood.
Try to find the source. If possible, remove one or two shingles/pieces out of the way so that you can get underneath easily without ruining your roof further.
If you follow these steps and are lucky enough to never have a roofing leak in your home, then you’ll not only need less maintenance done on your home’s exterior but also save money on future repairs down the road! Along with that, you’ll have saved yourself from having higher energy bills since your house won’t get as hot/colder as it would if leaks were present.
A roof leak repair cost can be so expensive! Save up by learning 100 ways to save money at home.